In this instructional blog post, we’ll guide you through the essential steps of seamlessly integrating 3D scanning into your creative process using the powerful features of Cinema 4D. Buckle up as we break down the process into clear, actionable steps, ensuring you can effortlessly navigate the roundtrip from physical reality to digital brilliance. Get ready to elevate your skills and bring your visions to life in the dynamic realm of 3D design. Let’s dive in!
While there are a lot of tutorials spread around the web, this one will go into details on the overall process and what steps to take to make the whole roundtrip . This is going to be a rather technical writeup, hopefully covering something that’s of good use for you. If you’d like to cut to the technical bit and don’t care about creative vision etc. click here
Project Scope
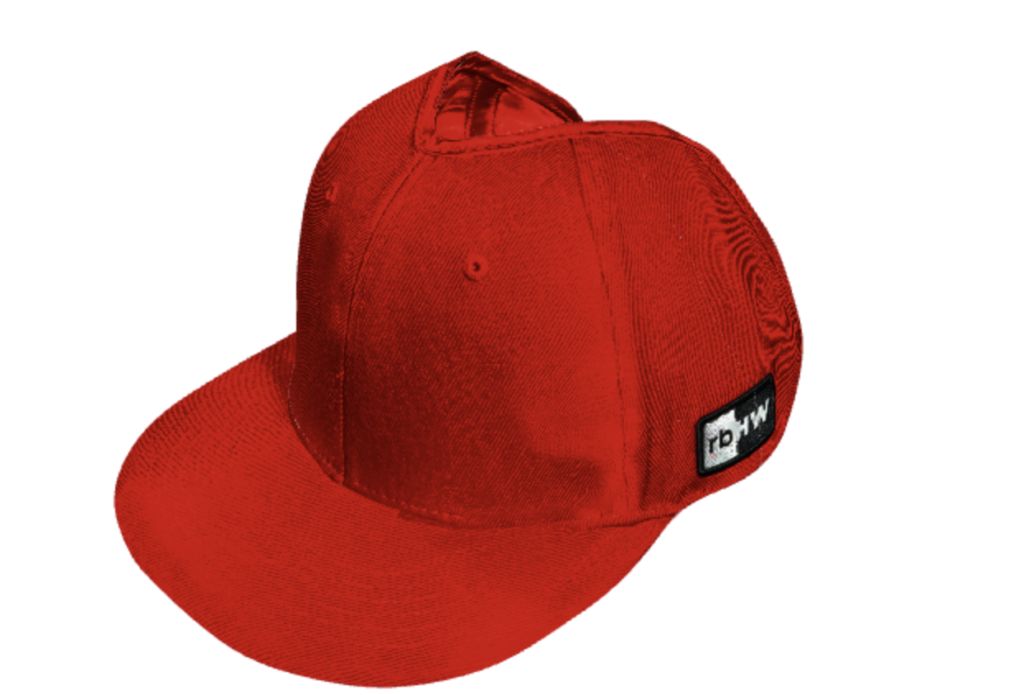
Our mission was based on the following requirements. Make our client’s hats into 3D models that could be used on their website along with photos. Hats needed to be realistic, with their own textures and not have crazy high enough poly counts.
Creative Decisions
Main creative decision was to use 3D scanning as opposed to 3D modeling from scratch to bring on both the realistic physical aspects of the hats but also keep the real life imperfections of the hats. The reason behind the latter, was to separate ourselves from the dropshipping/AI/spammy or scammy content by not relying on fake, computer generated, hyper-perfect renditions of these hats. We wanted to give the viewer proof that these hats exist in real life and are not fake.
The Challenges We Encountered and the solutions
We encountered quit a few challenges down the road, first one (obviously) being the lack of any exact resources for Cinema 4D, iPhone, LIDAR etc. and any other roundtrip info.
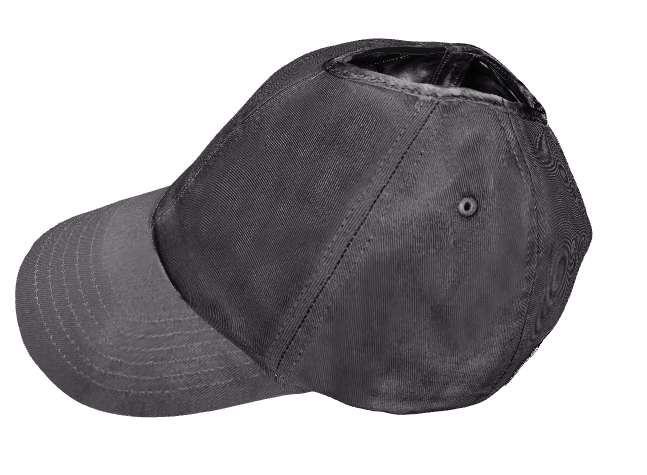
That said, how do you scan a soft object that can’t be flipped without changing its geometry? The hats have multiple holes and an interior and exterior making things even more complex. On top of that, the interior is made up of shiny silk. This sounds like a recipe for disaster. Our original idea was to have two scan passes: 1. exterior, 2. interior; and then marry them together in Cinema 4D. After rigorous tests this proved to not work since the geometry didn’t match each other once the hats were flipped around.
To the actual solution
The solution we found was to fix the hat vertically on a stand using the cap and scan the bowl of the hat instead scanning the inside and outside in a single scan pass. The cap would then be fixed later in C4D.
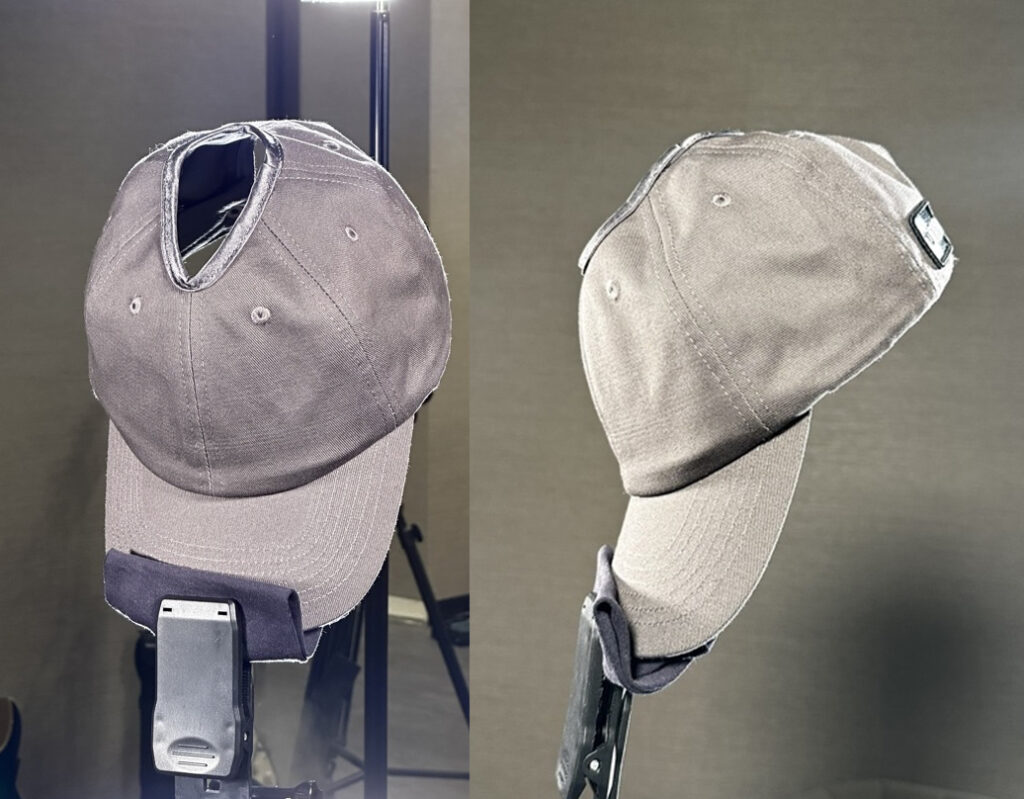
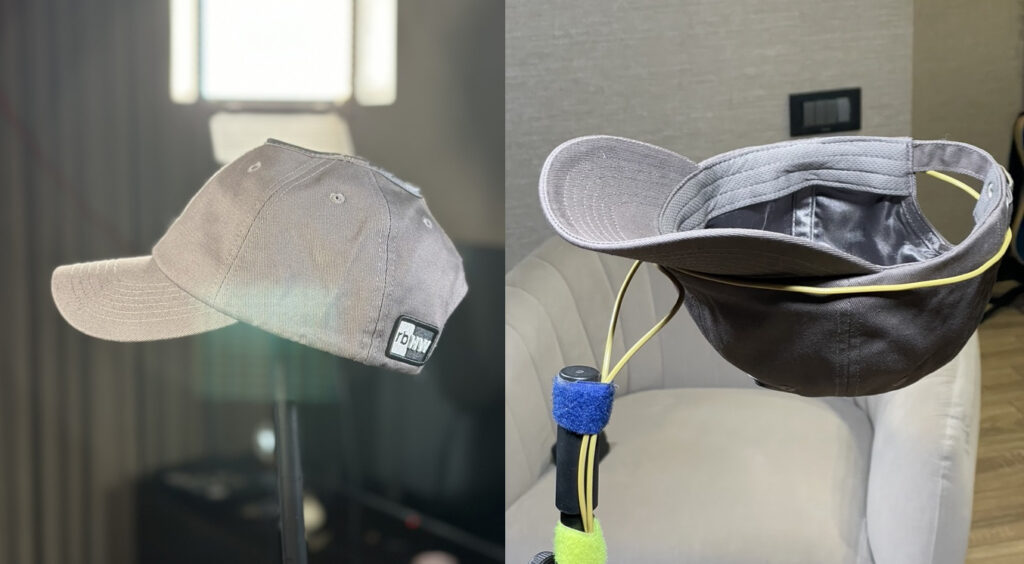
Inspired by our film/prop experience we used an aluminum solid core wire and “sprung” it up the inner band. This both makes the hat bowl rigid while also hiding the wire.

We used KIRI on an iPhone 14 pro with LIDAR. KIRI offers both free and paid plans. One trick we found is that irregardless what the app tells you, you can move the camera around, above and below to keep taking additional photos of the same angles. The more photos the merrier. The free version allows 200 photos per scan, and we aimed at around 150 photos per hat. We had 4 point lighting to light the top and the bottom of the hat all equally. Exposure should be the same to avoid any headache during texturing.

With the scanning stage behind us, export the OBJ to your computer. Fixing topology and UV mapping is our next step as the scanned models come with a messy topology and UV mapping. Use Zremesher in Cinema 4D 2024 to fix the topology. We also tried Instant Meshes and while it worked, the overall workflow wasn’t great. You may want to go down on polygon counts to make fixing the models easier, and then use subdivision to smoothen things out.
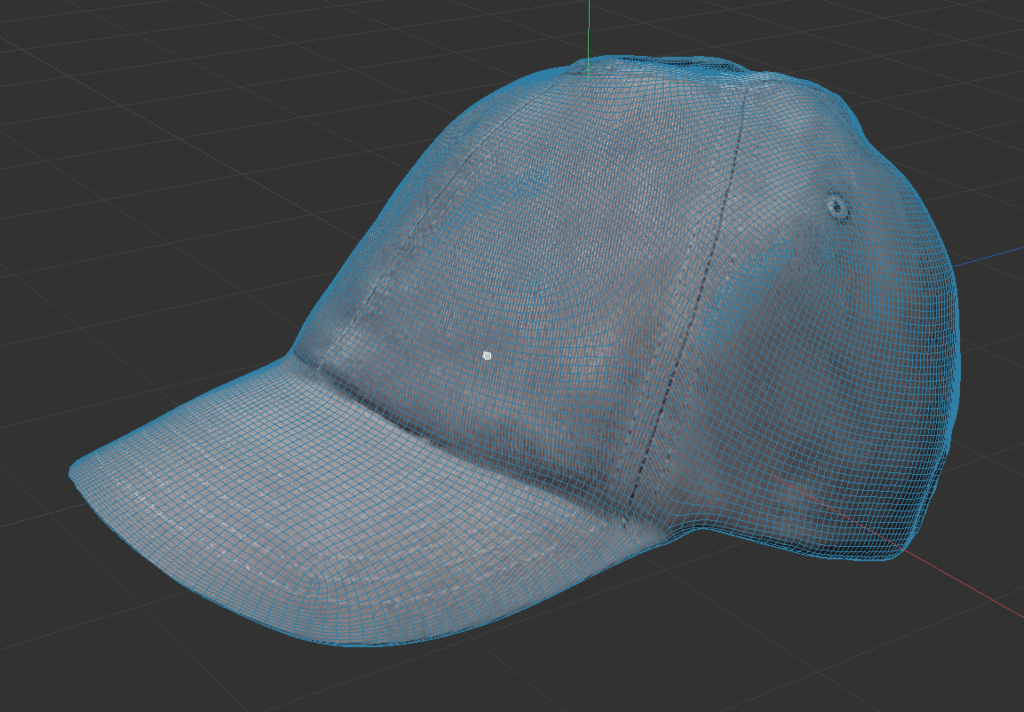
UV Mapping is also something you’ll need to do as we lose the UV map (which was messy anyways) once we use Zremesher or any other remeshing technique. Address the UV mapping on the new topology then use a common texture baking technique to transfer the original texture to the newest UV map.
Once the UV mapping is done, all you have to do is address the texturing. Things can get wonky here, so expect to spend some time on texturing and touching up details.
At the end, you should have a model that resembles the real life object somewhat realistically!